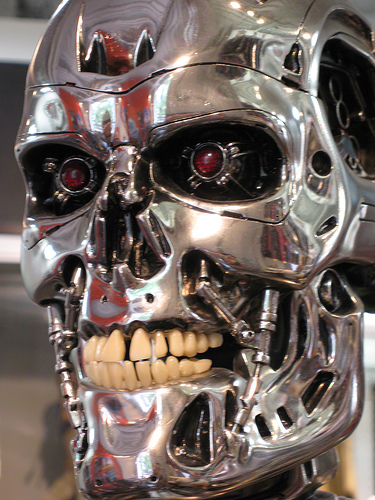
Don’t let SkyNet win! Take this poll!

Do NOT let this happen!

I want to put some finishing touches on my TinyCNC drawing robot before Maker Faire, but I’m a little ambivalent about how best to show off it’s drawing/CNC abilities.1 There are several excellent ways to control such a robot – perhaps you can help me decide?  My thought is that an IR remote would be really nifty, since I could just hand the “control” to someone and they could play with the robot, getting it to draw something.  Then again, feeding gcode to the ‘bot and having it actually draw something semi-recognizable would also be great.2

What's the best way to control a TinyCNC / drawing robot?

View Results

Loading ... Loading ...

For context, here’s the links to the various possible ideas for control mechanisms:

Please vote above3 and let me know what you’d like to see working at Maker Faire!

  1. Photo by tenaciousme []
  2. Heck, the robots are small enough that I’ll probably bring more than one. []
  3. Or, comment below []

TinyCNC – Working Keypad UI

http://www.youtube.com/watch?v=PZx_6Dd0Dgw

If you’re still on the fence about trying to build your own drawing robot/plotterbot, take heart.  (Skip to the bottom of the post if you want to check out the latest 3D printable files and Arduino code.)  If a relative newbie such as myself can make a go of it, I’m pretty sure you can too.

Last night1 I finally got the little ‘bot to really make use of the keypad as a modest user interface.  The robot is now using the USB cable purely for power purposes, rather than requiring the serial connection to the Arduino serial monitor as well drawing power from the USB port.  Now I can just connect the USB cable to a random USB charging device and operate the robot in a meaningful way by using the keypad.

In addition to the keypad direction system described in a previous post, now the “*” and “#” keys also have a usage.  The “*” key now starts and stops the Arduino from logging the inputs.2 Pressing the “#” key will play the most recently recorded inputs.

My record/playback system is super hacky and the ‘bot sometimes jitters before carrying out a command.  I’ll also have to implement a few additional changes to the design of Y axis before it can hold a pen reasonably stead.

But, it works!

Download the latest stable 3D printable parts on Thingiverse, latest Arduino sketch from Github, and play with one for yourself!

  1. Well, technically this morning? []
  2. If you forget whether it has been toggled to start or stop recording, the robot performs a little “wave” with the Z axis when it is ready to start recording and three little “waves” when it stops recording. []

Iron Man Armor

ironman-20x29

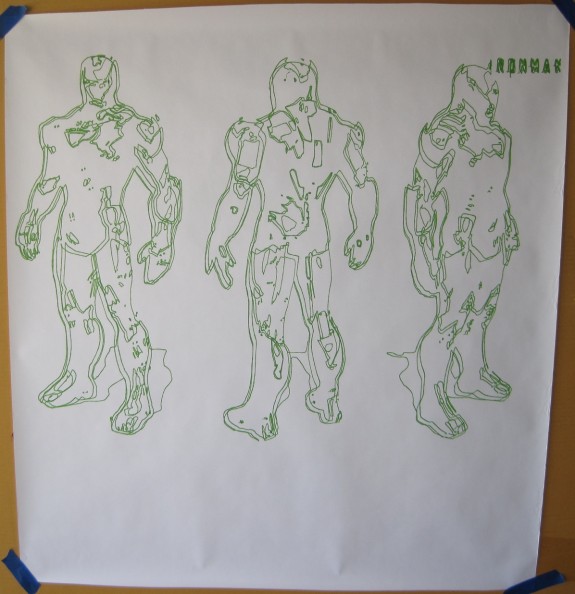
Iron Man Armor, green Sharpie on banner paper, 20″ tall by 29″ wide

This drawing of Iron Man, in green Sharpie on banner paper, was created at Maker Faire Bay Area 2014.  The finished drawing is 20″ tall by 29″ wide, nearly the entire width of the roll of paper.  The dimension refer to the drawing, not the sheet of paper.  The drawing took about four hours to complete.

I happened upon the picture of Iron Man from a SEGA video game while searching for something to draw.  I chose green for the drawing because, frankly, it was almost all I had left by the end of Maker Faire weekend.  As with several other drawings, I fiddled with the Inkscape “Trace Bitmap” function until I got a result I felt would come out nicely.  Rather than reducing the entire drawing to black and white shapes, as I did with the Serenity picture, I instructed the program to separate the drawing into several different colors, each in their own layer. Rather than shading each layer differently, as I did with the Fakegrimlock picture, I opted to just have the robot trace out each layer.

The result is that those areas of the drawing that are more “highlighted” are outlined concentrically several times.  There is some variation between each layer, which I would attribute to the servo cable getting caught on the edge of the paper or board while drawing.  Even so, I’m very happy with the result.

Star Wars Boba Fett

bobafett-20x22

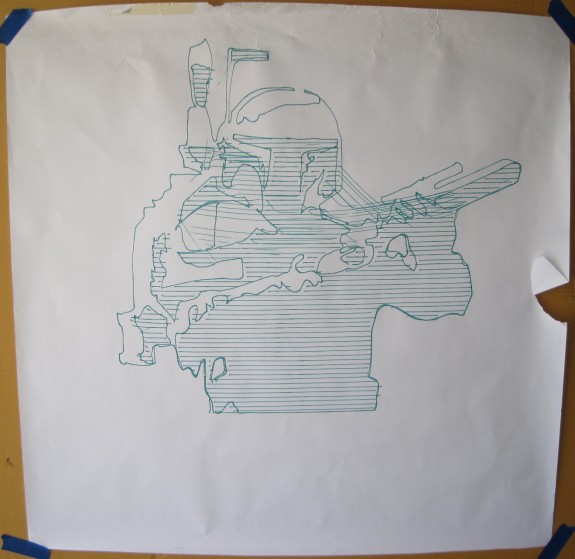
Star Wars Boba Fett, green Sharpie on banner paper, 20″ tall by 22″ wide, a little worse for wear

This robot drawing of Boba Fett is in pretty sorry shape after Maker Faire Bay Area 2014.  Green Sharpie on banner paper, 20″ tall by 22″ wide, the dimensions refer to the drawing, not the sheet of paper.  It took about three hours – mostly due to the hatching1 I added to shade parts of the drawing.

To create the drawing I used Inkscape’s “Trace Bitmap” function on an altered picture of Boba Fett I found on the internet.  It can help to “posterize” an image in GIMP before trying to “Trace Bitmap” in Inkscape.  This also allows a little more control over the shading and various regions.  Just as with the 100 Acre Woods drawing, the pen slipped out slightly in the pen holder, causing the some sweeping arcs to appear across the middle of the image.  Unlike that other drawing, they don’t appear to detract as much here.

Once drawn, I taped this picture to the cloth over the table at the front of the booth.  What I didn’t realize is that every child who walked up would pick at the tape and kick the bottom of the drawing with their feet.  While the central drawing is relatively untouched, it does suffer from the cosmetic default caused by the pen slippage.  Although it’s pretty obvious from the photograph above, the paper is actually torn at the right hand side and there is still some masking tape at the top left of the paper.

  1. Using the awesome Eggbot Inkscape plugin []

100 Acre Woods from Winnie the Pooh

100acre-18x25

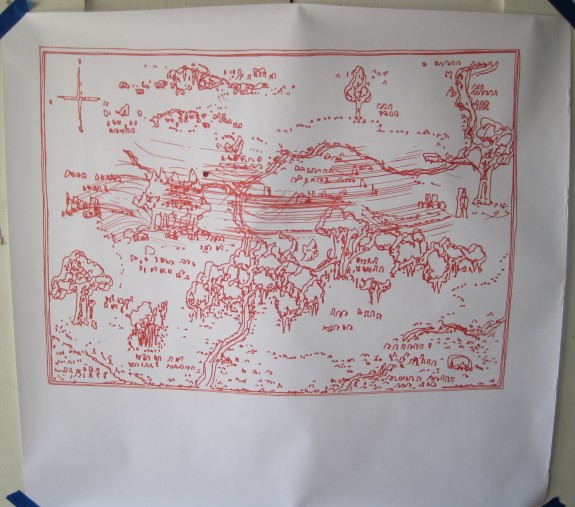
100 Acre Woods map from Winnie the Pooh, orange Sharpie on banner paper, 18″ tall x 25″ wide

This drawing of the Winnie the Pooh 100 Acre Woods map is orange Sharpie on banner paper, 18″ tall x 25″ wide.  The dimensions refer to the drawing, not the sheet of paper.  This drawing took about six hours to finish.

This isn’t my first attempt to convert images of the 100 Acre Woods map into a SVG file that could be drawn by a robot.  The last time I tried this was more than three years ago using my MakerBot Cupcake Unicorn pen plotter attachment.  This drawing is considerably larger than the 3″ square size available on a sticky note.

I really wanted to use my PlotterBot to draw a map this year.  This wasn’t really an option last year since I didn’t have the pen lift mechanism working yet.  A map tends to be rectangular, requiring the robot to be well centered, and have a lot of diverse details which would highlight the pen lifting abilities of the robot.  Plus, nice maps tend to be large – which suits my robot just fine.

I chose orange for the drawing as it seemed a fitting reflection of Pooh’s own coloring while lending a hint of “old timey map” as well.  There are two defects to the drawing which I feel obligated to disclose.  First, the reason for the defects.  Since these drawings take so very long, it’s hard to gauge when they’ll finish.  In the case of this drawing, I set it to draw over Saturday night since I knew it would take a really long time.  As I wasn’t even at the fair when the drawing finished overnight, the drawing ended with an inkblot in the top left quadrant.  Although this is an interesting, and sometimes even enhancing, consequence in some drawings, I don’t find it contributes much in this case.  You’ll also notice some curvey “stripes” across the middle of the drawing.  These are the result of the pen slipping out slightly in the pen holder, so that the pen lift mechanism didn’t completely lift the pen off the paper.

Setting aside the defects, the drawing is mostly without the skew evident in the police box sign drawing and the pen lifts elsewhere in the drawing are clear and clean.  I also found that I could run my robot fairly quickly, with the speed and acceleration cranked all the way up to 1000.  One particularly interesting and enjoyable part of the drawing was getting to watch it.  Unlike the “zig zaggy” pixelated style from my drawings last year, when drawing Inkscape files, the Polargraph software directs the robot to draw all the lowest points first and works its way upwards.  While this isn’t the most efficient path, the result is the observer (or visitors to the booth) gets to watch the little pen holder work on a spot then zip over to the other side of the drawing.

The sheet of paper has some slight wrinkling to the edges – probably caused by rolling and transporting the paper.
Doctor Who TARDIS Police Box Sign

policebox-23x17

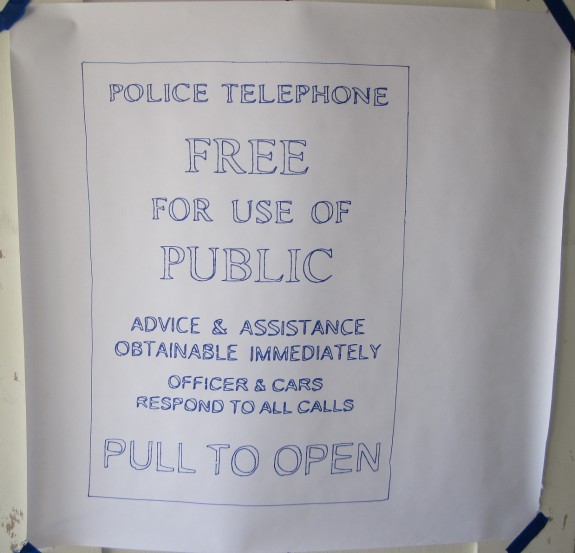
Doctor Who TARDIS Police Box sign poster, blue Sharpie on banner paper, 23″ tall x 17″ wide

Another robot drawing from Maker Faire Bay Area 2014 with the use of the pen lift mechanism.  The drawing is blue Sharpie on banner paper, 23″ tall x 17″ wide.  The dimensions refer to the drawing, not the sheet of paper.  This drawing of the Doctor Who TARDIS police box sign took about two hours to finish.

Although the drawing is slightly skewed, which was caused by apparently starting the drawing from slightly off of the expected home point, I’m rather happy with this one.  I guess my personal metric for whether I’m happy with a drawing is whether the final result is immediately recognizable as the thing it is supposed to be.  The pen lifts and pen drops were very clean – resulting in (mostly) complete shapes.  You’ll notice the “T” in “PULL TO OPEN” has a gap between the pen drop and lift.  Although it might look like the “T” also suffers from a lack of straight lines, that isn’t necessarily the fault of the robot.  The drawing was created by using Inkscape’s “Trace Bitmap” function to detect the outlines from a picture of a police box sign – so the lack of perfectly straight lines might very well have been a result of Inkscape’s interpretation of a bitmap drawing.1

This was the second to last drawing the robot and I created at Maker Faire Bay Area 2014.

  1. I blame Inkscape, but I chose the settings it used. []

Doctor Who “To Victory” Dalek Poster

Doctor Who "To Victory" Dalek poster, red Sharpie on banner paper, 28" tall x 23" wide

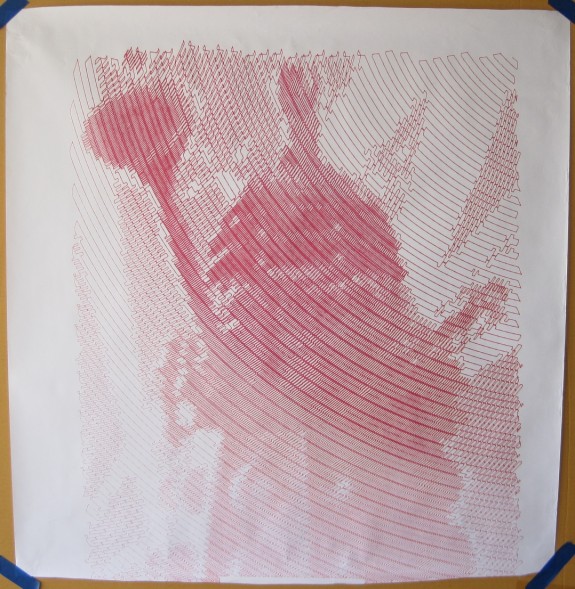
Doctor Who “To Victory” Dalek poster, red Sharpie on banner paper, 28″ tall x 23″ wide

Another robot drawing from exhibiting at Maker Faire Bay Area 2013.  This is the result of my PlotterBot drawing a cropped version of the “To Victory” Dalek poster on the BBC website which was released with the “Victory of the Daleks” episode from 2010.  ((Those faithful readers of my blog posts may recall my other attempt to memorialize this same drawing))  This drawing is red Sharpie on banner paper, 28″ tall x 23″ wide.  The dimensions refer to the drawing, not the sheet of paper.  This drawing took about eight hours.

Unfortunately, this drawing was longer than the sheet of paper I had allocated for it.  You can see at the bottom of the drawing a white uncolored patch where the blue tape was covering the edge of the paper.  However, if you can get over that defect, this is still a cool poster – and the biggest drawing I had ever done up to that point.

Since this drawing was posted on the fence at Maker Faire 2013, rolled up, archived, unrolled, transported to Maker Faire 2014 where it was displayed again, you can see a little wrinkling of the paper at the edges.  As you can also see, the drawing went off the edge of the paper.

New PlotterBot Drawing – Calvin & Hobbes on a wagon

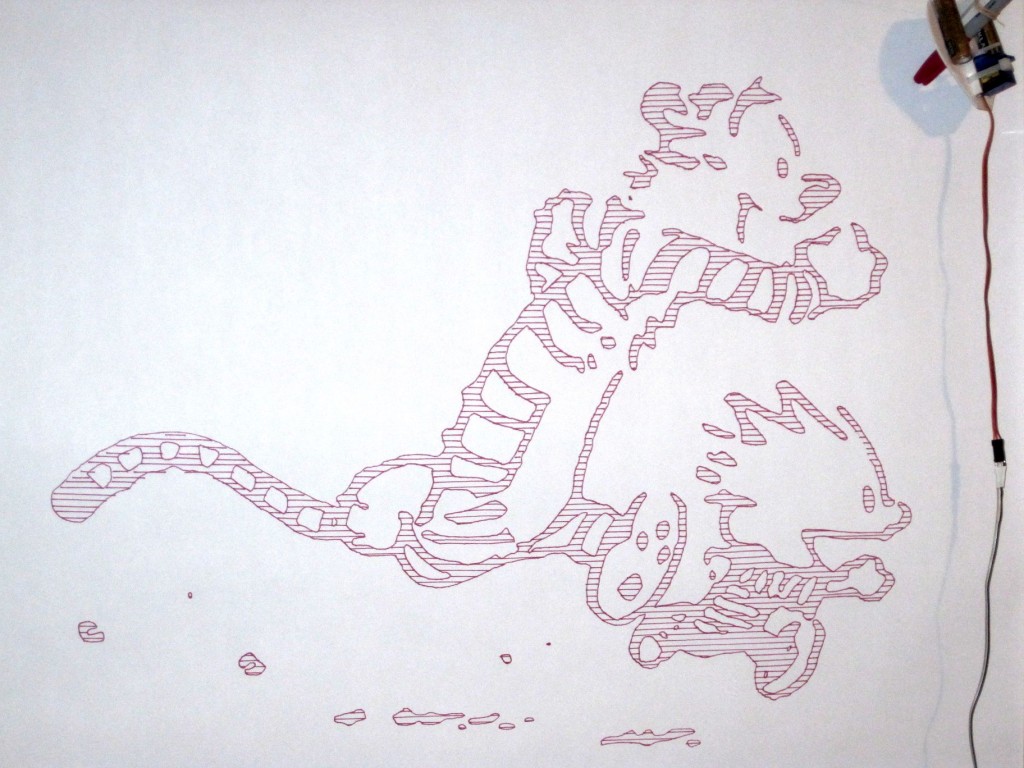
PlotterBot drawn Calvin & Hobbes on a wagon

PlotterBot drawn Calvin & Hobbes on a wagon

The other I came home from work and decided I just had to draw something.1 I decided on the above picture of Calvin & Hobbes and set the robot to work.  The drawing is big – about 29″ tall and 28″ wide.

While my tallest drawing remains the Yoda, this is definitely the widest drawing I’ve managed thus far.  I’m also pleased with my rather simplistic method of centering the robot.2 If the centering were off, the remainder of the drawing would be skewed.  And, as you can see from the horizontal lines, there isn’t any observable skewing.

There are some very mild artifacts in the drawing – spots where the pen wasn’t lifted far enough off the paper, some areas where you can see how the pen lifted up and down, and places where the shading/hatching doesn’t exactly line up perfectly with the outline of the drawing.  Even with these minor issues, I’m really happy with the drawing.

  1. I feel like when I don’t “make” something for a little while I get kinda twitchy. []
  2. I’ll be adding a tutorial for this later – it’s a lot simpler than you might think… []

PlotterBot in action – drawing Calvin & Hobbes

PlotterBot drawn Calvin & Hobbes

PlotterBot drawn Calvin & Hobbes

It must be that school is almost out and summer is in the air – because I started thinking back to my favorite comic strip of all time – Calvin & Hobbes.  I made the above drawing by taking a picture of a small 1″ x 1″ comic and “tracing” it into a vector graphic in Inkscape.1 Once I had an outline I was happy with, I used the EggBot extension for Inkscape from EMSL to add a hatching “shading” design to the drawing.  If I had made the hatching close together or used a wider tipped pen, this could have been a lot darker.  However, I really like the way it turned out.

The final drawing is about 19″ tall and 24″ wide.

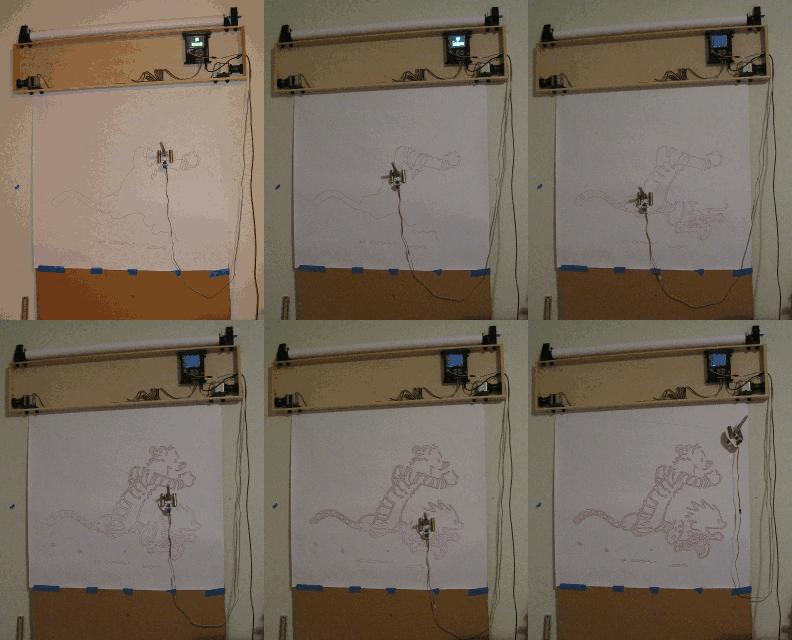
Since this drawing took about two hours, I took pictures at intervals from my digital camera on a tripod.  I compiled them together into an animated GIF, below.  (Please let me know if you can’t see it)

Draw PlotterBot!  Draw like the wind!

Draw PlotterBot! Draw like the wind!

The result is a two hour drawing completed in just under two seconds.  Nice, eh?

Also, if you need your Calvin & Hobbes fix, this website is running the old comics one day at a time.

  1. A tutorial is forthcoming… []

PlotterBot Drawn Illuminated Text

Post-Modern Illuminated Text

Post-Modern Illuminated Text

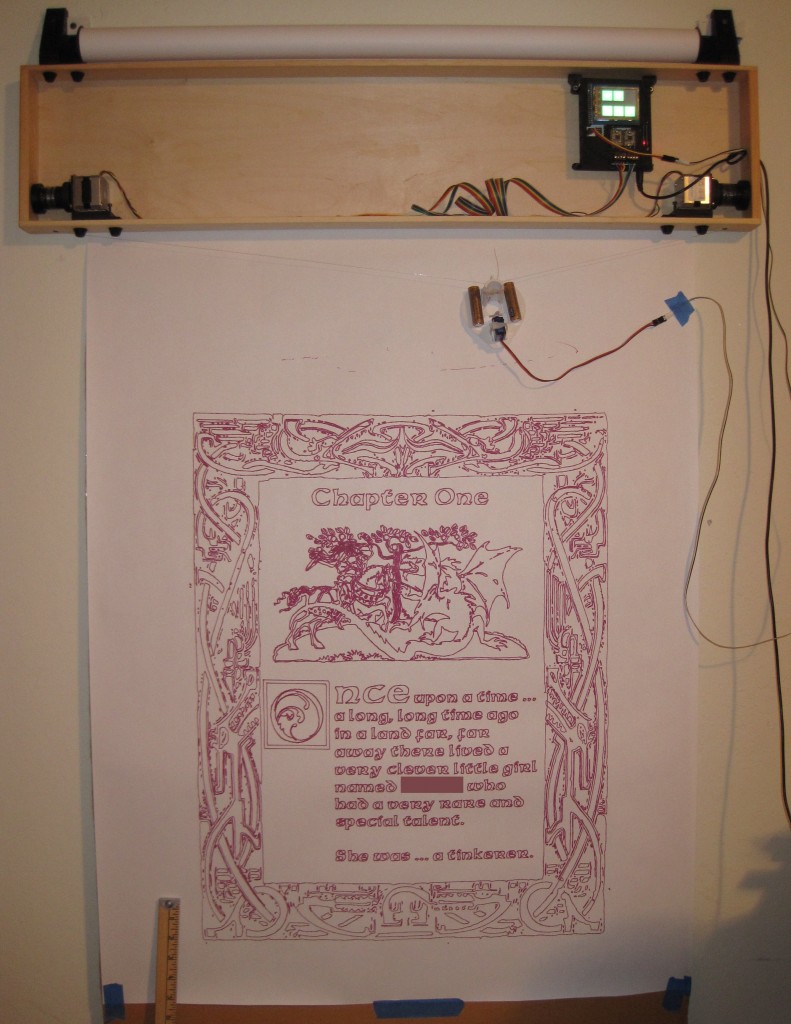
This morning I designed a surprise for my daughter.  It is an illuminated text version of the first page of a hypothetical storybook all about her.  The big smudge in the center is where I blocked out her name.  🙂  The drawing is roughly 20-inches wide and 28-inches tall. The drawing took more than 8-hours and was my first concerted attempt to draw something using servo powered pen lifts.

It reads:

Chapter One

ONCE upon a time … a long, long time ago in land far, far away there lived a very clever little girl named [_____] who had a very rare and special talent.

She was … a tinkerer.

The PlotterBot started drawing at about 2pm today and finished a little after 10pm.  By the time she went to bed, the robot had only completed the border.  I can’t wait to give it to her!

I designed the picture in Inkscape using a vector graphic of a cool border, a knight fighting a dragon, a combination of several fonts, and some touches of my own.  Once done I had to do a small amount of fiddling with Inkscape to make the file more “draw-able,” a process I will document in the next few days.