Don’t you just hate it when you read an online tutorial shows you how to build something – but totally glosses over how to wire it up?1 Me too. Fortunately for you, dear reader, I’m not going to let that happen to you. Not today, my friend, NOT TODAY.
The Basics
A few weeks ago I knew next to nothing about how to do anything with an Arduino and least of all how to wire one up. Even though people had told me it was easy, I couldn’t make much sense of Arduinos except to load sketches I had downloaded. Here’s some of the stuff I would loved to have known:
- Arduinos have a bunch of “pins” that can act as either inputs or outputs.
- When you program the Arduino, you tell it whether a pin is supposed to be an input or output.
- When the Arduino uses a pin as an “output” it can send a little bit of power to that pin. That’s enough power to run an LED and maybe a small motor, but not enough to do a whole lot. For things that require more power, you have to get it power from elsewhere.
- Arduinos have little “power regulators” that take power up to 12v and bring it down to 5v so the Arduino can use it without getting crispy.
- You can tap into that 5v power line to use for the things that require more power than the output pins provide – but if the things you connect to the 5v power line draws too much power, it can make the power regulator get… crispy. 🙂
Okay – that should be enough to get us started!
Wiring the Tiny CNC to a Mintduino
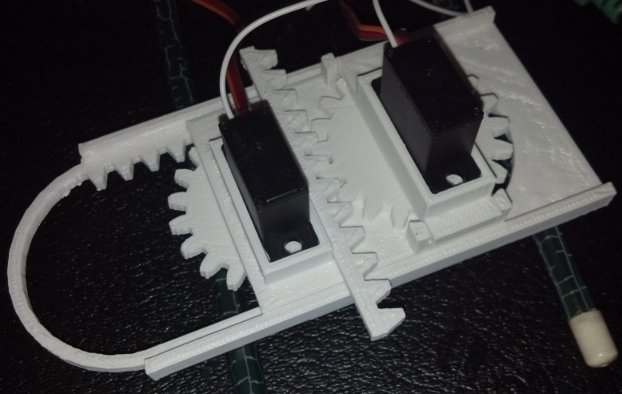
The easiest “out of the box” solution for wiring the Tiny CNC is with a Mintduino. The Tiny CNC has two (soon to be three) servos that have three wires – a positive wire, a ground wire, and a control wire. Each of the servos will need to have power sent to the positive wire, the ground wire grounded, and the control wire connected to an output pin on the Mintduino. The reason the Mintduino is the easiest solution is it has a breadboard which is a very simple way to connect all the servos’ wires without a lot of fuss.
Here’s how we do it:
- Build the Mintduino.
- Bring power from the programming pins to the board. Use a piece of red wire to connect the red positive rail to “a28.” Now when you connect the FTDI Friend to the Mintduino, it will be ble ot draw power from the USB cable.
- Add two 3-pin male headers to the breadboard – one on “i23, i24, i25” and one on “i26, i27, i28.”
- Using a red wire connect 5v power from the red positive rail to “i24” and “i27.”
- Using a black wire connect the ground rail to “i25” and “i28.”
- Connect the Arduino output pins of your choice (I used 12 and 13 here) to “i23” and “i26.”
- Connect one servo to “i23, i24, i25” with the brown ground wire connected to “i25,” center red positive wire connected to “i25,” and the orange control wire to “i24.”
- Connect the second servo to “i26, i27, i28” with the brown ground wire connected to “i28,” center red positive wire connected to “i27,” and the orange control wire to “i26.”
- Connect the FTDI Friend to the Mintduino with the USB port side facing the connectors for the servo.
Wiring the Tiny CNC to an Adafruit Trinket
The basic setup here will look pretty familiar to the breadboard from the Mintduino. Heck, I’m even using the itty bitty Mintduino breadboard in this example.
- Add two 5-pin male headers and three 3-pin male headers to the breadboard.
- One 5-pin header should be placed from “d4” to “d8” and another from “g4” to “g8.”
- One 3-pin header should be placed from “i9” to “i11,” a second from “i13” to “i15,” and a third from “i17” to “i19.”
- Use a red wire to bring the power directly from the USB on “g4” to the red positive rail. Do NOT bring the power from the pin marked “5v” at “g8” because that pin draws the 5v through the Trinket’s power regulator rather than directly from the USB line.
- Using red wires bring the 5v power from the red positive rail to the three servos at “i10,” “i14,” and “i18.”
- Use a black wire to bring the ground from the Trinket on “c4” over to the black ground rail.
- Using black wires to bring the ground from the ground rail to the three servos at “i11,” “i15,” and “i19.”
- The Trinket can operate up to three servos from pin 0, pin 1, and pin 2. Connect pin 0 at “h5” to “j9,” pin 1 at “h6” to “j13,” and pin 2 at “h7” to “j17.”
- Now drop the Adafruit Trinket in place as shown and you’re good to go!
Wiring the Tiny CNC to an Arduino Uno
I’ll take the pictures and update this part soon, but wiring the Tiny CNC is pretty easy too – as long as you have a breadboard. Just follow the steps for the Trinket above, but bring the power from the “Vin” pin to the red positive rail and the ground from one of the “GND” pins to the black ground rail. This will provide the power and ground for the servos. Now you need to do is connect three pins (say 11, 12, and 13) to the three control lines for the servo at “j9,” “j13,” and “j17.”
Okay! That’s it for the wiring!
- Photo courtesy of Peter Kaminsky [↩]


