Serenity Firefly class ship and quote

serenity-15x28

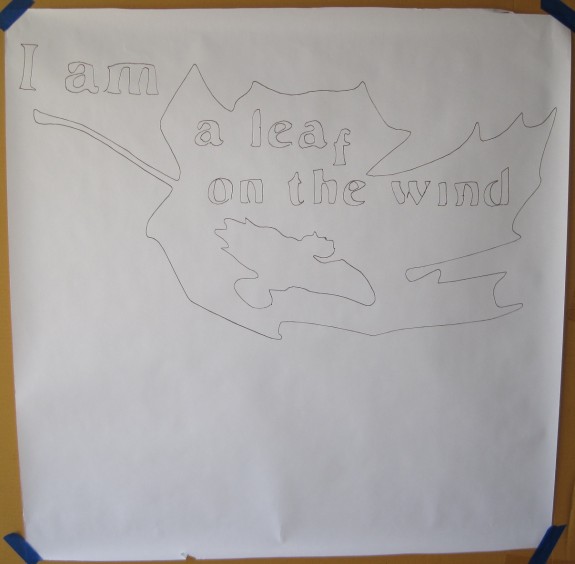
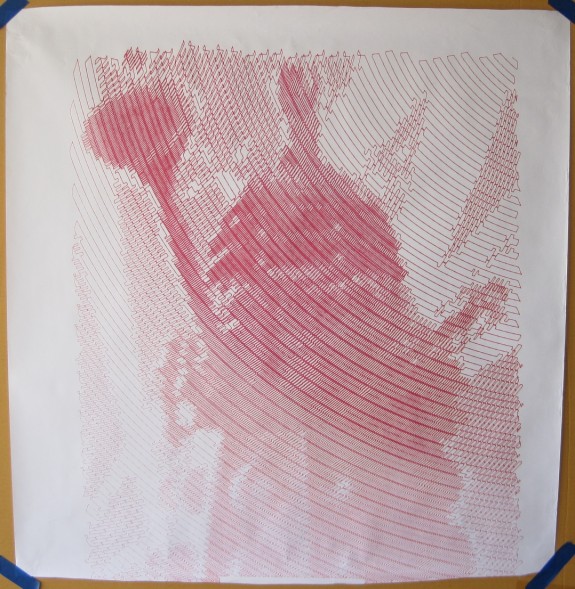
Serenity, Firefly class ship, brown Sharpie on banner paper, 15″ tall by 28″ wide

This drawing was created at Maker Faire Bay Area 2014.  This is a drawing of the Firefly class star ship “Serenity” from the television show “Firefly,” drawn in brown Sharpie on banner paper, 15″ tall by 28″ wide.  The dimensions refer to the drawing, not the sheet of paper.  This drawing took about an hour and a half to complete.

While this was probably the simplest and quickest of all of the drawings from that weekend, it is probably my favorite.  In honor of the ill-fated Browncoats, I chose a brown Sharpie for the drawing.  I had to fiddle mightily with Inkscape’s Trace Bitmap settings to turn the speckley drawing of the leaf, quote, and cutout of Serenity into a black and white picture.  As I worked to transform the drawing into a scalable vector graphic, I had to repair several of the letters to remain legible.

You may notice the misaligned “f” in “leaf” in the drawing.  This misalignment doesn’t appear in the SVG file, but did appear in the Polargraph control software I used to create the file to be drawn.  At first I was going to re-align the letter – then I decided I liked the chaotic implication of this one misplaced character.  To me it suggests the disarray surrounding the moments in the film when the quote was uttered, as well as the sudden but inevitable Wheedon-esque betrayal that followed.

This was one of final drawings of Maker Faire 2014.

Harry Potter Hogwarts Crest

hogwarts-25x20

Harry Potter Hogwarts Crest poster, blue Sharpie on banner paper, 25″ tall x 20″ wide

At this year’s Maker Faire Bay Area 2014 all of my robot drawings were done with the use of the pen lift mechanism.  This allowed me to create big awesome pictures in less time than it would have taken by using single line drawing techniques.  Although less ink is used, the use of the pen lift mechanism introduces a delay between each line.  This drawing of the Harry Potter Hogwarts Crest by Jmh20 took about two hours to finish.  The drawing is blue Sharpie on banner paper, 25″ tall x 20″ wide.  The dimensions refer to the drawing, not the sheet of paper.  

Drawing from scalable vector graphic formats sometimes takes a bit of extra setup.  In the case of this image, I removed several of the layers from the image.  The reason for deleting layers is that the robot will draw every edge of every layer – including those that mostly overlap with others.  This is why the raven’s wing and lion’s claw can be seen through the center of the crest.  Most of what I eliminated consisted of extra outlines.

This was the very last drawing I completed at Maker Faire Bay Area 2014.

Setting up at Maker Faire Bay Area 2014

PlotterBot - packed up and ready to go

PlotterBot – packed up and ready to go

One of the things I appreciate most about the design of my PlotterBot is that it is extremely modular and portable.  All of the parts have been designed so that the entire robot can be assembled and disassembled with a single 3mm hex wrench.  Pictured above is everything I need to setup the robot and spend all weekend drawing – the tools, hardware, replacement parts, extra tape, paper, and pens.1  Best of all, all this stuff fits neatly into my car’s trunk.  The robot underneath in the “well” of the truck, with the large pieces of plywood on top.

I took pictures from the same standpoint as I set up the booth.

This slideshow requires JavaScript.

Or, if you prefer, here’s an animated GIF of the setup.  🙂

Maker Faire Bay Area 2014 Setup

Maker Faire Bay Area 2014 Setup

  1. If only I had remembered the metric ruler! []

Bay Area Maker Faire 2013 Drawings

This slideshow requires JavaScript.

I’ve been meaning to share these drawings from Maker Faire Bay Area 2013 for more than a year now.  As I was reinstalling my PlotterBot to its original home on our living room wall I figured this was a good time to take pictures of these drawings to share.  I’ve also added a quick blog post to go with each of these drawings, to add a bit more background.  Here are the links to the Doctor Who dalek poster, Game of Thrones House Stark dire wolf poster, and Breaking Bad’s Walter White poster.

At last year’s Maker Faire my PlotterBot did not have a functional pen lift mechanism.  I had designed a pen holder with this ability in mind, but I still hadn’t actually tried it out.  In fact, it wasn’t until about two weeks after Maker Faire that I actually got a reliable pen lift working.  One of the great things about these “single line super pixelated drawings” is that they’re big and bold.  I also really like the abstract nature of this drawing style and how it promotes appreciating the works from a distance.  The downside to them is that they take a really long time and basically use up an entire pen with each drawing.

I had several other drawings on display back in 2013 – including a traveling salesman problem style Death Star, Yoda, and Nikola Tesla portrait.  This last one I gave to Joey Hurdy when he stopped by the booth just after Maker Faire ended on Sunday.

Doctor Who “To Victory” Dalek Poster

Doctor Who "To Victory" Dalek poster, red Sharpie on banner paper, 28" tall x 23" wide

Doctor Who “To Victory” Dalek poster, red Sharpie on banner paper, 28″ tall x 23″ wide

Another robot drawing from exhibiting at Maker Faire Bay Area 2013.  This is the result of my PlotterBot drawing a cropped version of the “To Victory” Dalek poster on the BBC website which was released with the “Victory of the Daleks” episode from 2010.  ((Those faithful readers of my blog posts may recall my other attempt to memorialize this same drawing))  This drawing is red Sharpie on banner paper, 28″ tall x 23″ wide.  The dimensions refer to the drawing, not the sheet of paper.  This drawing took about eight hours.

Unfortunately, this drawing was longer than the sheet of paper I had allocated for it.  You can see at the bottom of the drawing a white uncolored patch where the blue tape was covering the edge of the paper.  However, if you can get over that defect, this is still a cool poster – and the biggest drawing I had ever done up to that point.

Since this drawing was posted on the fence at Maker Faire 2013, rolled up, archived, unrolled, transported to Maker Faire 2014 where it was displayed again, you can see a little wrinkling of the paper at the edges.  As you can also see, the drawing went off the edge of the paper.

Maker Artist Ytai Ben-Tsvi and his IOIO Board Plotter

Ytai showing off his plotter art at Codame 2013

Ytai showing off his plotter art at Codame 2013

Easily one of the most memorable aspects of exhibiting at this year’s Maker Faire Bay Area was getting to meet and interact with lots of other Makers.  Ytai Ben-Tsvi had built and brought a pen plotter of his own design – and it was amazing.

Ytai’s pen plotter used an Android tablet, his IOIO OTG board1 , two stepper motors, two comically large spools, and lots of custom code to turn pictures taken with the tablet into instant portraits on the fly.

His plotter was everything a Maker Faire exhibit should be – highlighting the intersection of art and technology while inviting the audience to be a part of the action.  Can you believe this guy was reluctant to call himself an artist?

After Ytai was invited to participate in the Codame 2013 art-tech festival2 he decided to create an entirely new drawing algorithm to turn images into a single line drawing which appears to be sharp scribbles up close and a detailed image from a few meters away.

Photo transformations with Ytai's ScribblerDemo

Photo transformations with Ytai’s ScribblerDemo

What I love about Ytai’s drawing process is that it produces a drawing with a sense of whimsy and movement without the hard number crunching necessitated by a Traveling Salesman Problem3 style drawing.4  By allowing the algorithm to have lines cross over one another, something the TSP method eschews with its own aesthetic, Ytai’s drawings essentially gets “for free” extra dark patches where lines closely intersect.5

Looking at this drawing, it seems to me that an SVG created from his algorithm conveys so much more meaning with far less points than a TSP file.  At least for my own PlotterBot, far fewer points would also mean a much faster, and more satisfying to watch, drawing.  I would estimate that in the time it took Ytai to cover a wall, I might have been able to create one, perhaps one and a half, drawings.  And, as any good Maker does, Ytai has shared the fruits of his hard work in the form of the source code on Github.

  1. Ytai’s succinct description of the IOIO board says it all, “The IOIO-OTG is a printed circuit board for electronics hobbyists and prototypers, which addresses a very common problem: how do I use my {computer, tablet, phone} to control my {robot, dish-washer, cat-feeder, etc.}.” []
  2. An art-tech festival?!  Why the hell aren’t there more of these things?! []
  3. Link to blog post showing a method []
  4. Doesn’t exactly hurt to have a cute kid as a subject either []
  5. Having played with TSP drawings a lot, I have discovered that finding the right balance between lightness versus darkness and simplicity versus complexity and quick versus glacial to be… maddening.  Like H.P. Lovecraft maddening []

PlotterBot Frequently Asked Questions

Display Posters at Maker Faire Bay Area 2013

Display Posters at Maker Faire Bay Area 2013

Although I’ve helped out at the MakerBot booth several times in prior years, this was the first time I had my very own booth.1 I had a great time answering questions and explaining how the robot worked.  I thought you might be interested in some of the questions:

  • What holds the pen up?  Magnets?
    • My PlotterBot suspends the pen holder by fishing line – which is nearly invisible from more than a foot or so away under normal lighting.  Under very bright light, the shadows of the fishing line do start to appear.  However, from more than a foot or two away, it looks like the pen holder is floating around the surface of the paper.  Unless you notice the motors turning the pulleys, it almost looks magical.
    • Sandy Noble’s Polargraph uses beaded cord and Der Kritzler uses toothed belts.  While these machines lack the “magic quality” one gets from using fishing line, the are a capable of more repeatable accuracy.
  • What software do you use?
    • I use Sandy Noble’s Polargraph firmware and software, running on an Arduino Mega shield (“Polarshield SD“) of his design.  I purchased most of my electronics directly from Sandy and I can’t recommend them enough.
Maker Faire Display Board

Maker Faire Display Board

  • What kind of accuracy/resolution does it have?
    • This was a difficult question to answer.  To explain I pointed to the large text banner at the top of the project board next to my robot.  You can download all of the materials from my PlotterBot Maker Faire exhibit here or you can see a copy of the text just after I managed my first successful pen lifts.
    • I would estimate that the robot could probably manage to just barely draw from around 30pt font to an arbitrarily large size.  However, if you used beaded cord or, better yet toothed belts, and small sprockets or gears in conjunction with a fine tip pen you could probably manage even finer repeatable accuracy.
  • How fast can it go?
    • I suggested that the entire robot adhered to that most basic of all engineering principles – “Good, cheap, and fast – pick two.”  It’s fairly cheap and easy to build and yields pretty amazing results, but there is a practical upper limit to the speed with which you can operate the robot.  If you run it too fast, the motors may skip steps resulting in poor results.  Also, running it too fast would likely also cause the pen to skip across the drawing surface or might not give the pen enough of an opportunity to leave an ink trail.  For best results, I try to find a speed that works well with my pen holder and pen to draw quickly enough so the pens don’t bleed much and slow enough to get good results.
  • How big can it draw?
    • Basically, an unlimited size.  There are some practical limitations from the Arduino software which suggest that a 63 meter diagonal is the biggest you can accomplish with Sandy’s software.  However, with some more effort to tinker with the code, there’s no real reason why even larger sizes wouldn’t be possible.  Also, the larger the pulleys/sprockets/gears the larger the drawing could be as well.  Bill Ola Rasmussen posted some very interesting mathematical considerations regarding line tension and the practical limitations of resolution at the edges of the machine’s capabilities.  Basically, if you want a big drawing, you need a really big robot.
    • While all this is very abstract, it’s also nice to show how these kinds of robots can reach amazing proportions.  Sandy has used a Polargraph to draw across huge wall sized installations. (About 20 feet wide).  Two similar machines, Hektor which draws in spraypaint and Viktor which draws in chalk, were used to draw on entire walls.
  • What kind of pens do you use?
  • How long does a drawing take?
    • 2′ x 3′ drawing typically takes about 4-6 hours depending upon the density of the drawing and thickness of the marker line.  The longest drawing I’ve ever done took about 8 hours.  And it was AMAZING.
  • How do you create these drawings?
    • The software basically translates normal images (JPG) into very pixelated versions of themselves and then into instructions the robot’s firmware understands.  The process is a little more direct for vector drawings, converting the SVG files directly into instructions for the robot.  I can send the instructions to the robot either over USB or saving them to an SD card which it reads.
  • How much did it cost to make?
    • I sourced all the parts I needed for my first robot, rather than trying to scrounge for motors and wire.  As a result, it probably cost around $100 for a machine that used an Arduino Uno and an Adafruit Motor Shield and had to be tethered to a computer via a USB cable.  For someone willing to tear apart old electronics and hack things together from scrap wood, it could probably be built for around $30-$50.  The robot I had on display cost around $250 in electronics, $10 for the cost of the printed plastic parts, about $40 for the wood and hardware, and a wooden box left over after a catered event.  To buy plastic parts, all the hardware off the shelf, and electronics would probably cost about $500.
  1. Well, I did share the space with my daughter! []

Liked our booth at the Maker Faire? Take it home with you!

Subscribe to my mailing list to get a PDF with all the materials from the Maker Faire booth plus all the information, links, videos, and resources you’ll need to build your own PlotterBot from scratch – even if you’ve never tried building anything before!


I promise not to spam you, ever. I will only send you e-mail about how to build your very own robot and updates to any plans.