
If you’re here checking out my site after my presentation, you can check out all the slides from my presentation above. If you’d like more information about the individual things in the slides, I posted an update for most of them over on Hackaday. If you’ve still got some questions, feel free to leave a comment below, hit me up on twitter, email me directly.
Category Archives: Maker Faire
Maker Faire 2016 Drawing Robot Presentation Slides
Maker Faire Bay Area 2016 was a wild ride! If you were able to come to my presentation on tiny drawing robots – thank you! If you weren’t able to make it, I’m sorry I missed you. I got to see some old friends ((Like you Kongorilla!)) and make some new ones ((Like you Robert, Vanna, Elijah, and Matt)) , which is probably the biggest reason I blog and exhibit and present at Maker Faire.
Admittedly, I was a concerned that I would be talking to a bunch of empty benches, that I would run through all of my slides in the first five of my allotted 25 minutes, or that I would be presenting to a completely silent crowd. If you came to the presentation, you got to see that none of those things happened. I started talking to the crowd a little early, answering some questions and letting people try out my demonstration robot with the keypad. When I actually started the presentation the benches were full and there were several people standing around them. There were some really great questions from the audience and lots of enthusiastic ideas.
If you didn’t come to the presentation, you missed both of my daughters making impromptu appearances, one uncooperative robot, one cooperative robot, and you had the chance to grab a “maker card” and actually use my demonstration robot.
As promised, I’ve posted my slides (above) so you can relive the magic.
Default Series TitleCare and Feeding of Your TinyCNC Drawing Robot
I’m bringing this fully assembled robot to Maker Faire on Sunday!
During my presentation at Maker Faire on Sunday I’ll be showing people how to build their very own TinyCNC drawing robot. However, some things are best done in a written form – so you can refer back to the instructions while you work.
- Print these parts on a well-calibrated 3D printer
- Use the 8 plastic printed parts, 3 servo motors, and one zip tie to assemble the robot
- Wire the robot to your favorite microcontroller
- Program your microcontroller to make your robot do nifty things
How to Build a Tiny Drawing Robot at Maker Faire Bay Area 2016
Drawing Robots at Maker Faire 2016!
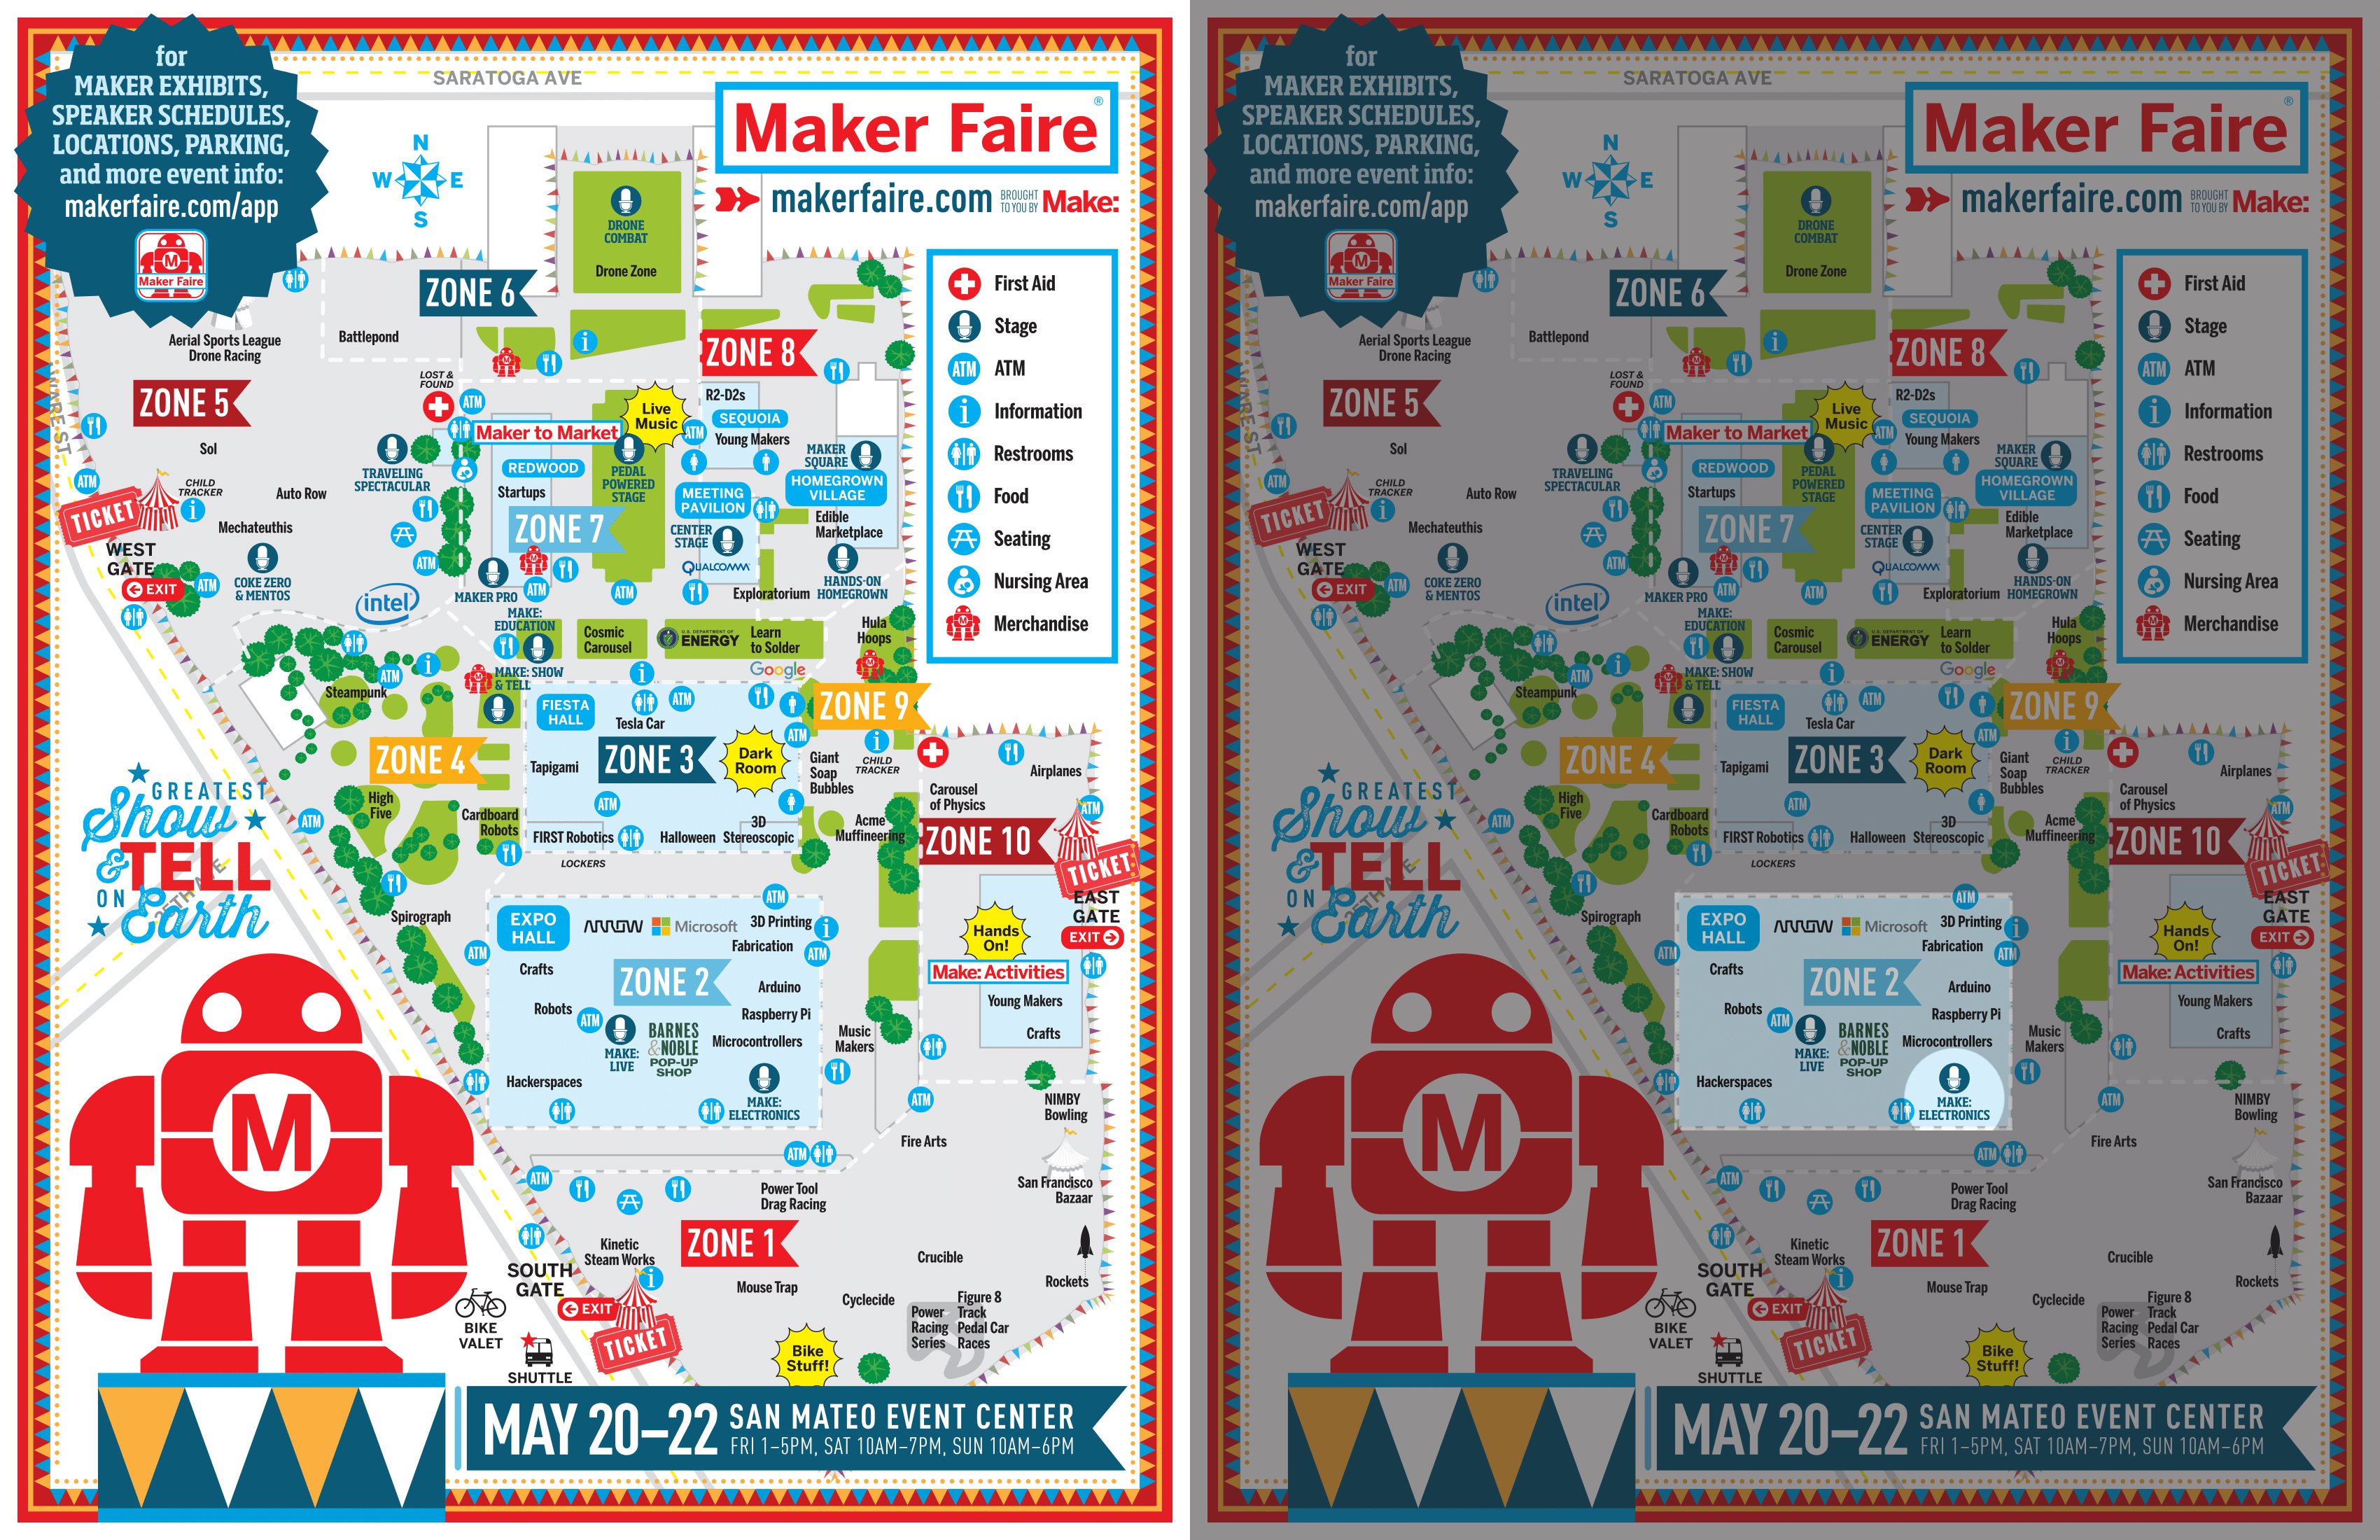
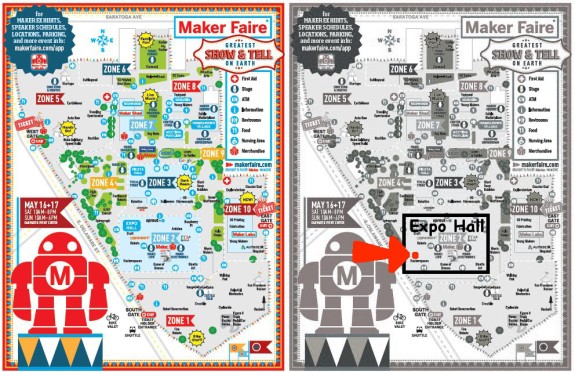
I’ll be doing a short presentation on how to build (and operate) a tiny drawing robot at Maker Faire Bay Area 2016. My time slot is Sunday May 22, 2016 from 11:00am to 11:25am at the Make: Electronics stage in Zone 2 aka “Expo Hall.” You can see where I’ve outlined Zone 2 and the Make: Electronics stage in the above picture.
If you’re around, I’d love to see you. However, I know how hectic Maker Faire can be and how difficult it can be to get anywhere. If you want to hang out, I’m planning to go to the Maker Paella Dinner on Friday night on the Maker Faire grounds and the Hackaday meetup on Saturday night O’Neill’s Irish Pub in San Mateo. ((Tickets to the Hackaday meetup are free – just follow the link and RSVP))
Don’t let SkyNet win! Take this poll!

Do NOT let this happen!
I want to put some finishing touches on my TinyCNC drawing robot before Maker Faire, but I’m a little ambivalent about how best to show off it’s drawing/CNC abilities. ((Photo by tenaciousme)) There are several excellent ways to control such a robot – perhaps you can help me decide? My thought is that an IR remote would be really nifty, since I could just hand the “control” to someone and they could play with the robot, getting it to draw something. Then again, feeding gcode to the ‘bot and having it actually draw something semi-recognizable would also be great. ((Heck, the robots are small enough that I’ll probably bring more than one.))
For context, here’s the links to the various possible ideas for control mechanisms:
- Sending gcode over USB
- Physical numeric keypad
- IR remote – perhaps with this part from Adafruit
- A small joystick, such as this one from Adafruit
- Potentiemeters for Etch-a-Sketch-like wheels
- This wacky soft circular potentiemeter
Please vote above ((Or, comment below)) and let me know what you’d like to see working at Maker Faire!
Default Series TitleFind me at Maker Faire!
Here I am!!!
Here’s where I am at Maker Faire! Back of the Expo Hall. Look for the booth decked out with lots of drawings!
My daughter brought her “How to Make Super Awesome Puppets” display and is sharing the space. You can’t miss us!
Learn How To Build a Drawing Robot
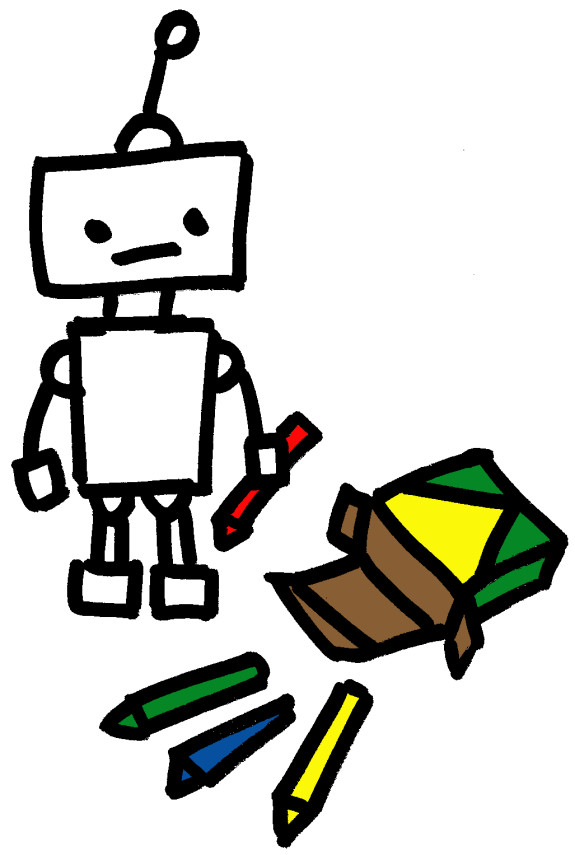
Robots can’t draw without your help!
Thanks for stopping by my drawing robots booth at Maker Faire! If you enjoyed seeing drawing robots at Maker Faire, why not take the entire booth home with you? Just leave your email address to get a PDF with all the materials from my booth and get occasional emails about robots. No spam, ever.
Maker Faire Bay Area 2015!!!
Join me at Maker Faire 2015!!!
Maker Faire Bay Area 2015 is just a few days away! I hope you’re as excited as I am!
I’ve made some minor improvements to my large drawing robot and am going to bring a tiny drawing robot as well. The changes to the big drawing robot are:
- “Feet” for Underside of Project Box
- My robot is built into a shallow wooden box. On the top of that wooden box there is a “holder” for a roll of paper. By adding little “feet,” as short as 1/8 inch or so, to the underside of the project box, the box no longer pushes against the roll of paper – which makes it easier to pull paper down when drawing.
- Revisions to Paper Roll Holder
- As it is, the paper roll holder is a little close to the project box, so the paper sometimes bumps against it. This isn’t much of a problem, but one that can be eliminated easily.
- A notch in the top of the paper roll holder. This way, rather than having to dismantle the robot, I can just lift the old paper roll out and drop in a new one.
- Batteries for Pen Holder
- The pen holder uses AA batteries, not for power, but for dead weight. Right now the batteries are held in place by hot glue. I would rather there was a slot on the holder for actually holding the batteries.
And, for those of you interested in seeing more of my TinyCNC, I’ll be bringing that too! I’ve been working on a little something there as well. Here’s what I’ve done:
- Mounted TinyCNC
- On a cigar box! The TinyCNC is bolted to the top of a cigar box kindly donated by a local smoke shop. A small solderless breadboard and Arduino now live inside the cigar box as well.
- Trying out New Interface
- I tried using the TinyCNC at first with an Arduino, feeding it Gcode-like commands over the serial interface. Then I tried saving designs as coordinates and flashing an Adafruit Trinket with the coordinates and drawing that. Since the Trinket doesn’t have a serial connection, this meant I lost a lot of the functionality of the tiny robot.
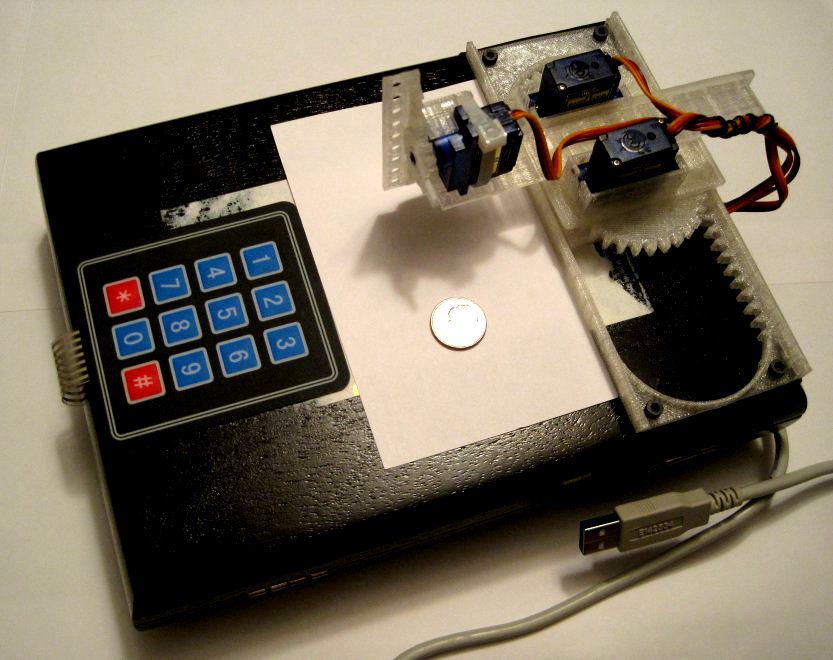
- This time I’m using a membrane 3×4 matrixed keypad to control the robot. The keypad is also mounted to the cigar box.
- Trying out New Code
- I can get the Arduino to recognize keypresses reliably, but I can’t get the ‘bot to move in response… yet. 🙂 Heck, I still have almost 36 hours until showtime, which is plenty of time. So far, it does absolutely nothing at all – except shudder. I’m not that worried about it though, I can always go back to an older version of the Arduino sketch.
As far as actually showing a working demonstration of the TinyCNC, I have a few ideas. Here’s what I’d like to show off, in descending order:
- Tiny robot, controlled by a numeric keypad, letting people draw on pieces of paper and take them home.
- Tiny robot, with several pre-programmed designs, letting people hit a number on a keypad, having it draw a pre-programmed design, and taking the piece of paper home.
- Tiny robot with a single push button mounted on box, which draws a single pre-programmed design when pressed, people take the piece of paper home.
- Tiny robot, connected to my laptop, drawing things sent from the laptop, and let people take a piece of paper with the drawing home.
What will be ready by Friday afternoon? I have no idea!!! You can either stop by and see for yourself or tune in on Monday night when I post a recap of the weekend.
Maker Faire Bay Area 2014 Drawings
If you missed the PlotterBot exhibit at Maker Faire Bay Area 2014, I’ve got you covered. Above are most of the drawings that were on display at my booth. A few of the drawings from 2013 were also on display.
This year I had the pen lift mechanism working and wanted to draw things that not only highlighted the robot’s ability, but that people would find recognizable and enjoyable. One of the best parts about drawing from SVG files, rather than high pixelated bitmap drawings as I did the year prior, is that it is much more entertaining to watch. When the robot is working its way in big arcs across a sheet of paper, the rocking movement of the pen holder is almost imperceptible from a distance. When drawing from an SVG file with lots of discrete regions, the robot will draw the lowest points first and work its way upwards. Although this can lead to an extremely inefficient path, the result is that the robot will tend to do a small speck in one area, then zoom to another region of the drawing, then back again.
While drawing SVG files can be relatively quick, a simple drawing taking only about two hours, the delays caused by performing pen lifts and pen drops and zipping between locations can make a drawing take several hours longer than one would anticipate. If the drawing includes shaded regions, it can take even longer.
There are several drawings which are, unfortunately, not pictured on this website – because I gave them away. One drawing, blueprints for a dalek in purple Sharpie, I gave away before I remembered to take a picture. A young gal, dressed as the eleventh Doctor, had stopped by the booth several times to fawn over the drawing. As it was the end of the fair, I just gave it away. I’m pretty sure it made her day. This is one drawing I look forward to doing again – this time even larger. Since it was drawn right-side up, it could only be drawn 30″ wide – the width of my paper roll. If I were to do it again, I would draw it on its side so it could be much much larger.
The last two drawings were for friends of mine were in need of banners for their booths. But, these are stories for another blog post.
Setting up at Maker Faire Bay Area 2014
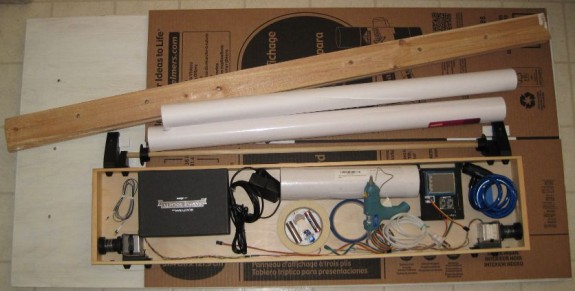
PlotterBot – packed up and ready to go
One of the things I appreciate most about the design of my PlotterBot is that it is extremely modular and portable. All of the parts have been designed so that the entire robot can be assembled and disassembled with a single 3mm hex wrench. Pictured above is everything I need to setup the robot and spend all weekend drawing – the tools, hardware, replacement parts, extra tape, paper, and pens. ((If only I had remembered the metric ruler!)) Best of all, all this stuff fits neatly into my car’s trunk. The robot underneath in the “well” of the truck, with the large pieces of plywood on top.
I took pictures from the same standpoint as I set up the booth.
Or, if you prefer, here’s an animated GIF of the setup. 🙂
Maker Faire Bay Area 2014 Setup