Setting up at Maker Faire Bay Area 2014

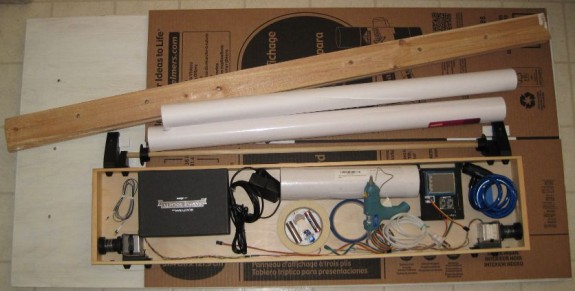
PlotterBot - packed up and ready to go

PlotterBot – packed up and ready to go

One of the things I appreciate most about the design of my PlotterBot is that it is extremely modular and portable.  All of the parts have been designed so that the entire robot can be assembled and disassembled with a single 3mm hex wrench.  Pictured above is everything I need to setup the robot and spend all weekend drawing – the tools, hardware, replacement parts, extra tape, paper, and pens.1  Best of all, all this stuff fits neatly into my car’s trunk.  The robot underneath in the “well” of the truck, with the large pieces of plywood on top.

I took pictures from the same standpoint as I set up the booth.

This slideshow requires JavaScript.

Or, if you prefer, here’s an animated GIF of the setup.  🙂

Maker Faire Bay Area 2014 Setup

Maker Faire Bay Area 2014 Setup

  1. If only I had remembered the metric ruler! []

Bay Area Maker Faire 2013 Drawings

This slideshow requires JavaScript.

I’ve been meaning to share these drawings from Maker Faire Bay Area 2013 for more than a year now.  As I was reinstalling my PlotterBot to its original home on our living room wall I figured this was a good time to take pictures of these drawings to share.  I’ve also added a quick blog post to go with each of these drawings, to add a bit more background.  Here are the links to the Doctor Who dalek poster, Game of Thrones House Stark dire wolf poster, and Breaking Bad’s Walter White poster.

At last year’s Maker Faire my PlotterBot did not have a functional pen lift mechanism.  I had designed a pen holder with this ability in mind, but I still hadn’t actually tried it out.  In fact, it wasn’t until about two weeks after Maker Faire that I actually got a reliable pen lift working.  One of the great things about these “single line super pixelated drawings” is that they’re big and bold.  I also really like the abstract nature of this drawing style and how it promotes appreciating the works from a distance.  The downside to them is that they take a really long time and basically use up an entire pen with each drawing.

I had several other drawings on display back in 2013 – including a traveling salesman problem style Death Star, Yoda, and Nikola Tesla portrait.  This last one I gave to Joey Hurdy when he stopped by the booth just after Maker Faire ended on Sunday.

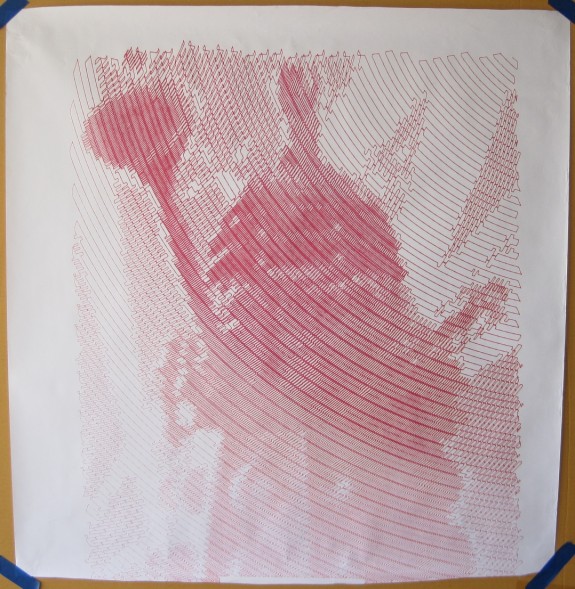
Doctor Who “To Victory” Dalek Poster

Doctor Who "To Victory" Dalek poster, red Sharpie on banner paper, 28" tall x 23" wide

Doctor Who “To Victory” Dalek poster, red Sharpie on banner paper, 28″ tall x 23″ wide

Another robot drawing from exhibiting at Maker Faire Bay Area 2013.  This is the result of my PlotterBot drawing a cropped version of the “To Victory” Dalek poster on the BBC website which was released with the “Victory of the Daleks” episode from 2010.  ((Those faithful readers of my blog posts may recall my other attempt to memorialize this same drawing))  This drawing is red Sharpie on banner paper, 28″ tall x 23″ wide.  The dimensions refer to the drawing, not the sheet of paper.  This drawing took about eight hours.

Unfortunately, this drawing was longer than the sheet of paper I had allocated for it.  You can see at the bottom of the drawing a white uncolored patch where the blue tape was covering the edge of the paper.  However, if you can get over that defect, this is still a cool poster – and the biggest drawing I had ever done up to that point.

Since this drawing was posted on the fence at Maker Faire 2013, rolled up, archived, unrolled, transported to Maker Faire 2014 where it was displayed again, you can see a little wrinkling of the paper at the edges.  As you can also see, the drawing went off the edge of the paper.

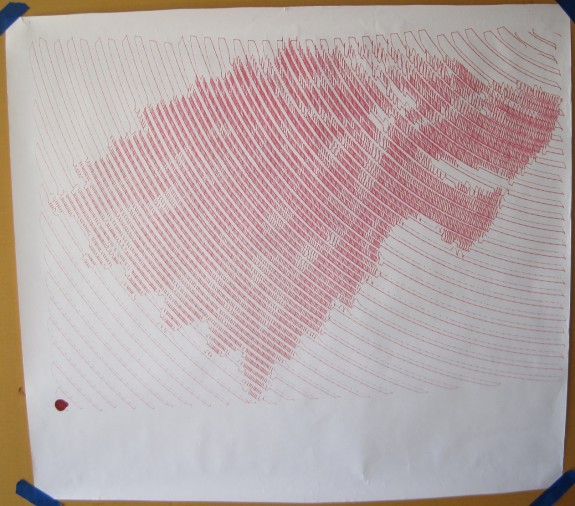
Game of Thrones House Stark Dire Wolf

housestark-20x28

Game of Thrones House Stark Dire Wolf, red Sharpie on banner paper, 20″ tall x 28″ wide

This is one of my robot drawings from exhibiting at Maker Faire Bay Area 2013.  It is a robotic interpretation of the excellent “metallic Game of Thrones wallpaper” by Sasha Vinogradova.  This drawing is red Sharpie on banner paper, 20″ tall x 28″ wide.  The dimensions refer to the drawing, not the sheet of paper.  This drawing took about five hours.

I don’t remember why I chose red for this drawing, but this is another instance where I particularly like the effect of a large “blood red” mark at the end of the drawing.  I feel like it balances the negative space and leave a slight ominous tone. This is another wide drawing, though a little off center.  If I were to do this drawing over again, I would probably make it smaller.

Since this drawing was posted on the fence at Maker Faire 2013, rolled up, archived, unrolled, transported to Maker Faire 2014 where it was displayed again, you can see a little wrinkling of the paper at the edges.

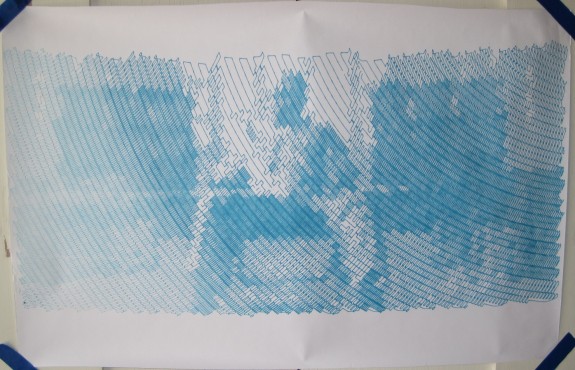
Breaking Bad’s Walter White

Breaking Bad's Walter White, blue Sharpie on banner paper, 14" tall x 29" wide

Breaking Bad’s Walter White, blue Sharpie on banner paper, 14″ tall x 29″ wide

This is one of my drawings from exhibiting at Maker Faire Bay Area 2013.  It features Breaking Bad’s Walter White sitting in a warehouse surrounded by bricks of cash.  The drawing is blue Sharpie on banner paper, 14″ tall x 29″ wide.  The drawing took about five hours to complete, because of all of the dark areas.

I chose the blue Sharpie for this drawing to echo the series’ famous “blue meth.”  I think it would have looked equally good in green1 or yellow.2  This one of my wider drawings – very nearly to the edge of each side of the sheet of paper, which is fairly difficult to do.  Since this drawing was started at the top left corner3 I couldn’t have been positive it would have finished within the left edge of the paper.  You can also see a dark spot at the bottom left where the pen soaked into the drawing for a bit before I picked up the pen.  Depending upon the drawing, I actually like this effect.

Since this drawing was posted on the fence at Maker Faire 2013, rolled up, archived, unrolled, transported to Maker Faire 2014 where it was displayed again, you can see a little wrinkling of the paper at the edges.

  1. Greed, envy, cash []
  2. To call out the yellow hazard suit []
  3. You can see how the drawing is darker at the top right, lighter at the bottom left []